Thương hiệu - Kính hiển vi
- Cân điện tử
- Máy đo lường các loại
- Máy đo 3 chiều CMM
- Máy đo độ cứng
- Profile projector
- Máy đo độ nhám
- Smart Scope
- Thiết bi đo mới
- Chuẩn Bị Mẫu
- Máy kiểm tra bánh răng
- dau mo cong nghiep
- may cong nghiep
- Air Micrometer
- Máy kiểm tra lò xo, spring testing machine
- ATAGO
- Kanetec
- Vertex
- IMV
- Sotec
- RION
- COSMOS
- LINE SEIKI
- Sekisui
- GRAPHTEC
- HORIBA
- EXTECH
- TAYLOR HOBSON
- THREE-IN-ONE
- DENSO
- TOEI
- KORI SEIKI
- NANOTEC
- WJIT
- RUIBAO
- AMITTARI
- LANDTEK
- OEM
- HUATEC
- ALIYIQI
- LINSHANG
- GIM
- CEM
- DASQUA
- SHUANG LU
- MITSUBOSHI
- ONO SOKKI
- SANHE
- TMK
- AUTONICS
- JAKON
- ZONHOW
- ALEX
- ECHOTECH
- GASTEC
- AIGU
- BOLE
- KSJ
- LEEB
- GIM
- TAKASHIMA KEIKI
- BING M
- MASTECH
- ELITECH
- ANRITSU
- WALTER
- AS ONE
- PCE
- HTI
- RIKEN KEIKI
- RKC
- SMART SENSOR
- MIGISHITA
- SLYB
- KYOTO
- HUATO
- GREENTEST
- Sanko Seikohjyo
- ACCRETECH
- ACO
- May do do PH
- Dụng cụ cắt gọt kim loại/ dao kỹ thuật/Cutting tool
- BĂNG TẢI
- Động cơ điện - Motor giảm tốc
- MACHINE TOOLS
- Thiết bị đo PCE-Anh
- Thiet bi do Laserline
- KIMO-Phap
- NIIGATA SEIKI
- BESTOOL-KANON
- HOZAN
- HAKKO
- FUJI TOOL
- SEKONIC CORPORATION
- YAMAMOTO SCIENTIFIC TOOL LABORATORY
- JFE ADVANTEC CO.,LTD.
- CEDAR
- SANKO ELECTRIC
- KETT
- ATAGO
- SUCESS
- OSG
- ISSOKU
- SHIMPO
- SHINKO DENSHI
- A & D
- HIOKI
- SANWA
- DAICHI KEIKI
- NAGANO KEIKI
- KANETEC
- OBISHI
- TECLOCK
- PEACOCK
- CITIZEN
- DIATEST
- MAGNESCALE
- IMADA
- TOHNICHI
- AIKOH
- MITUTOYO
- VESSEL
- ENDO
- URYU
- SIMCO
- OBA
- SATO
- DOM
- OTSUKA
- PEAK
- CARTON
- KANOMAX
- KYORITSU
- EISEN-Pin gauge
- VISION ENGINEERING
- TECPEL
- KURODA
- NPK-Air Tool
- TRIENS
- NICHIDO
- HATAYA
- YODOGAWA-Dust Collection
- MÁY ĐO ĐỘ CỨNG
- NITTO KOHKI
- OJIYAS
- ASAHI
- METROLOGY
- NIKON
- ELECTRONICA
- HEXAGON
- BYC MICROSCOPE
- SOBEK
- CHINO
- YOKOGAWA
- THIẾT BỊ MÀI ĐÁNH BÓNG
- TandD
- THIẾT BỊ TỰ ĐỘNG HOÁ
- SẢN PHẨM KHUYẾN MÃI
- THIẾT BỊ ĐÃ QUA SỬ DỤNG
- ATTONIC
- HIOS
- FLUKE
- OMEGA
- INSIZE
- TOGOSHI
- UNITTA
- RSK
- Renishaw
- KITAGAWA
- KIKUCHI
- ISUZU SEISAKUSHO
- HOKUSO
- KITO-PALANG
- TOYO KOKEN
Danh mục sản phẩm
Dịch vụ sửa chữa
Hỗ trợ trực tuyến
Bộ đếm truy cập
 | Đang online | 75 |
 | Hôm nay | 1869 |
 | Hôm qua | 1400 |
 | Tuần này | 1869 |
 | Tháng này | 21621 |
 | Tất cả | 4861097 |
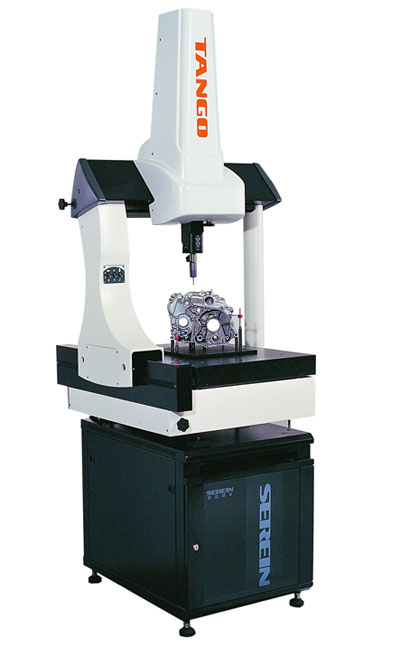
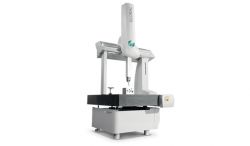
Máy Đo Tọa Độ 3 Chiều Bán Tự Động Tango Hexagon, Manual CMM
- Tên sản phẩm: Máy Đo Tọa Độ 3 Chiều Bán Tự Động Tango Hexagon, Manual CMM
- Model: Máy Đo Tọa Độ 3 Chiều Bán Tự Động Tango Hexagon, Manual CMM
- Tiêu chuẩn: Chau au
- Xuất xứ: China
- Đơn giá: lien he ()
- Bảo hành: 12 Tháng
- Model khác: Máy Đo Tọa Độ 3 Chiều Bán Tự Động Tango Hexagon, Manual CMM
Đặt hàng
MÔ TẢ SẢN PHẨM
http://www.phuockieng.com/san-pham/may-dieu-khac-go-pk-1325b/
http://www.phuockieng.com/san-pham/may-dieu-khac-go-tu-dong-zkm-1325a/
Máy Đo Tọa Độ 3 Chiều Bán Tự Động Tango Hexagon, Manual CMM
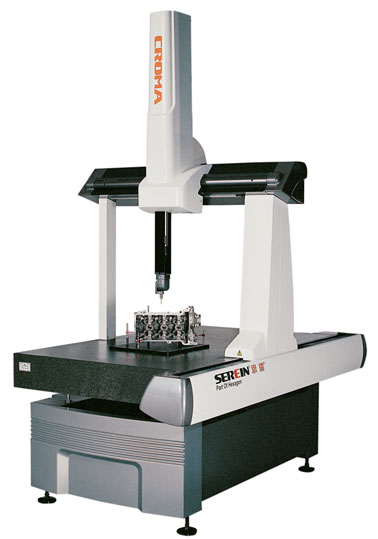
Main features:
• Cross beam and Z axis are made of surface-anodized aero metal with superior temperature consistency, reducing the mass of the moving parts and the inertia of the machine running at high speeds;
• High-precision self-cleaning air bearing is used for the permanently wear-resistant guide ways of all the three axes for more steady operation;
• Imported high-precision optical scale used for all three axes;
• Precise triangular beam patented technology is applied to Axis X, featuring lower center of gravity, better mass-rigidity ratio and more reliable motion relative to rectangular and cross beams;
• PCDMIS BASIC(PREMIUM) measuring software is easy to operate and reliable;
• Use of integral dovetail guide way on axis Y, efficiently eliminates the moving pendulum and ensures measuring accuracy and stability (for models 564 and 686);
• Ergonomic design
• Working environment: temperature (20±2)℃,humidity 55%-65%
Specification and Technique Data as follows:
|
Model |
Tango 564 |
Tango 686 |
Tango 8106 |
Tango 8126 |
||
|
Strokes(mm) |
X |
500 |
600 |
800 |
800 |
|
|
Y |
600 |
800 |
1000 |
1200 |
||
|
Z |
400 |
600 |
600 |
600 |
||
|
Measurement space (mm) |
Dx |
614 |
714 |
914 |
914 |
|
|
Dy |
1155 |
1355 |
1555 |
1755 |
||
|
Dz |
535 |
735 |
735 |
735 |
||
|
Dx1 |
135 |
135 |
135 |
135 |
||
|
Dy1 |
105 |
105 |
105 |
105 |
||
|
Overall Size(mm) |
L |
1155 |
1355 |
1555 |
1755 |
|
|
W |
940 |
1040 |
1240 |
1240 |
||
|
H |
2209 |
2609 |
2609 |
2609 |
||
|
Capacity(kg) |
300 |
300 |
500 |
500 |
||
|
Machine Weight(kg) |
725 |
1030 |
1200 |
1400 |
||
|
MPEe(μm) |
3.5+L/300 |
4.5+L/300 |
5.0+L/300 |
|||
|
Raster Resolution |
0.4μm |
|||||
|
Air Pressure |
120NL/min, 0.45Mpa |
|||||
|
Temperature |
20±2℃ |
|||||
|
Humidity |
45%-75% |
|||||
2. PC-DMIS for WINDOWS™ Metrology Software
Certified by the most authoritative international institute --- Exemplary software in the industry
PC-DMIS BASIC and PC-DMIS PREMIUM are high price performance ratio software series specifically developed by Hexagon for general coordinate measurement users. With core PC-DMIS technology, user-friendly interface, intelligent feature identification functions, this software is easy to learn, prismatic and effective, and can help enterprises enhance the speed and efficiency of coordinate measurement as well as product quality by inspection and process control.

PC-DMIS BASIC, with comprehensive intellectual measuring functions, is simple and fast, rendering accurate and efficient inspection of various complex components.
· Fully PTB certified, in conformity to ISO and ANSI standard tolerance evaluation standard, ensuring measurement reliability and accuracy
· Powerful and flexible graphic user interface (GUI), can be used to customize your own report. Simple and fast. Chinese online help files provide instructions on execution functions as well as ways to run the powerful metrology software
· Quick start interface: Follow prompted instructions, execute probing system management and application, part coordinate management and application, measurement and construction of geometric features, tolerance evaluation, etc
· Powerful evaluation of form and position tolerances, including: straightness, flatness, circularity, cylindricity, conicity as well as various complex curve plane contours, etc.
· Evaluation of relative datum geometric elements position such as: parallelism, perpendicularity, angle, symmetry, position, axiality, concentricity, axial run-out, radial run-out, axial total run-out, radial total run-out
· Intellectual feature measuring function
Ø Automatic recognition of geometric element features, create corresponding graphs in graphic windows, and illustrate measuring data on dynamic preview window
Ø Automated programming and inspection, for quick calculation and construction of geometric relationship, as well as evaluation and analysis of form and position tolerances,
· 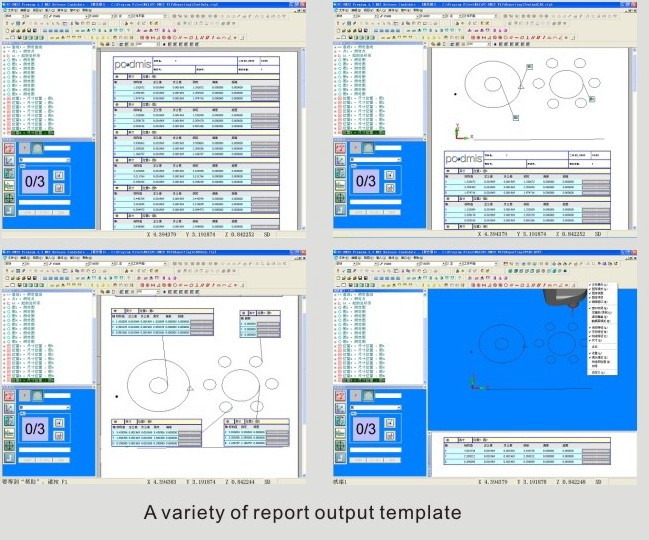 Intuitive and exquisite interface window, entertaining your eyes at work Powerful feature construction function: up to 14 categories, including projection, intersection, mirroring, best fit and error revision, tangency, parallel, perpendicular, combination, movement, rotate, deflection line, deflection scale and taking the original point as construction datum etc. Flexibly solve the measuring tasks with missing features and complex features.
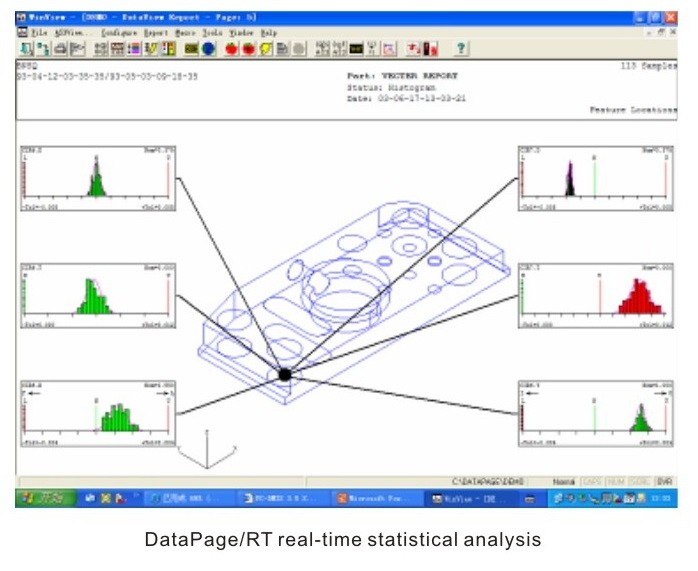
· Various professional reporting templates can be combined with graphs, facilitate preview of inspection data and management; you can also customize your report.
Continued…
PC-DMIS PREMIUM boasts not only all the functions and advantages of PC0DMIS BASIC, but the versatile CAD application function deriving from the powerful and professional CAD engine. This software can fully explore the measuring machine’s application and efficiency.
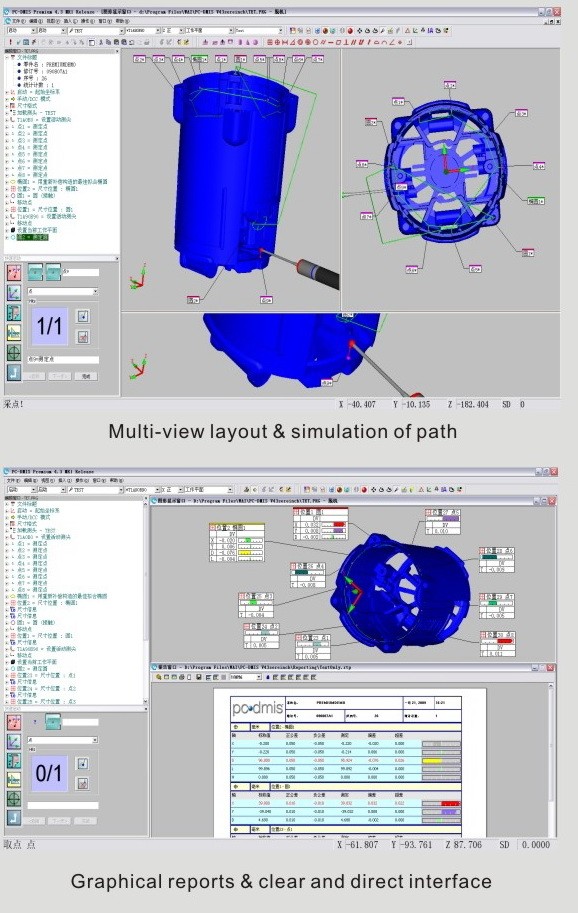
· With all the functions of PC-DMIS BASIC
· Compatible to International standard DMIS language and VISUAL BASIC 6.0 Built-in advanced programming demand. Provides solutions for various programming demand.
· All round CAD capability, support CAD of numerous format like IGES, DXF, DWG, STEP, XYZIGK, STL, DES, VDAF etc; fast realize programming and inspection; finish calculation of geometric relationship, construction as well as the form and position tolerance evaluation and analysis.
· Powerful CAD functionality
Ø Simultaneous multi-Importation of CAD diagrams, establish corresponding graph layers based on required inspection dimensions.
Ø Based on CAD module, con accomplish part measuring path simulation and collision check.
Ø Display random CAD cross sections as required, (direct cross section will reproduce the complex structure of part interior cavity) can directly see through the parts and modify basic features of CAD.
Ø Edit and revise the property of CAD, such as editing CAD graph layers, modification of original coordinate system, (CAD) mirror image of feature elements;
Ø Two modes of CAD feature reading available-Curve line and curve plane. Enables flexible definition of complex measuring points pattern and realizes effective and accurate “click and measure”
Ø Graphic clamping and measuring machine, completely simulate actual working state.
· Feed inspection data back to CAD for production guidance and necessary revisions.
· Combine measuring data with reverse engineering software to realize reverse engineering of complex unknown parts.
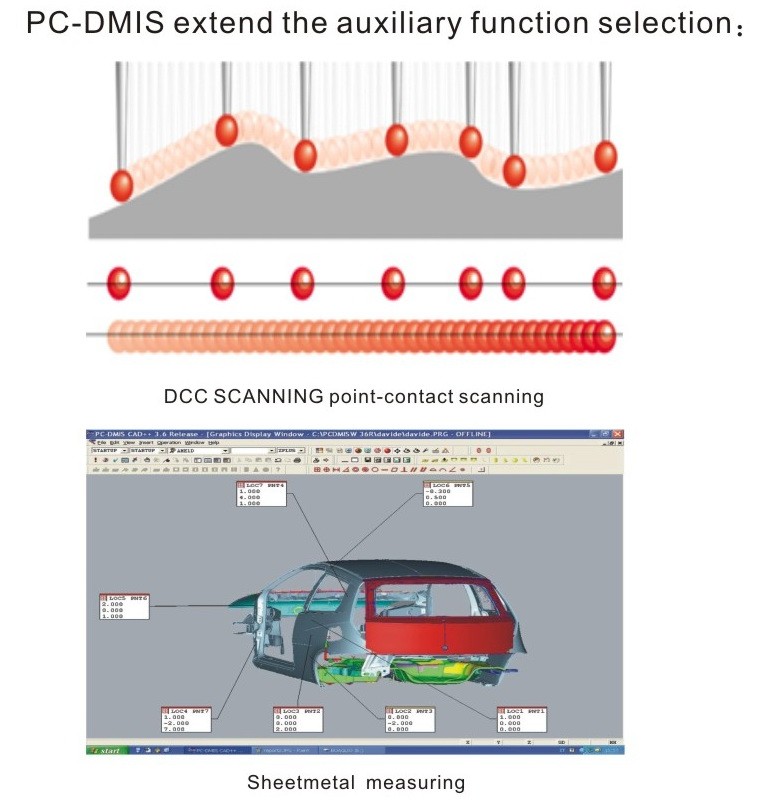
3. Tools & Accessories
Certified Reference Sphere (Standard supply)
Workstation Table (Standard supply)
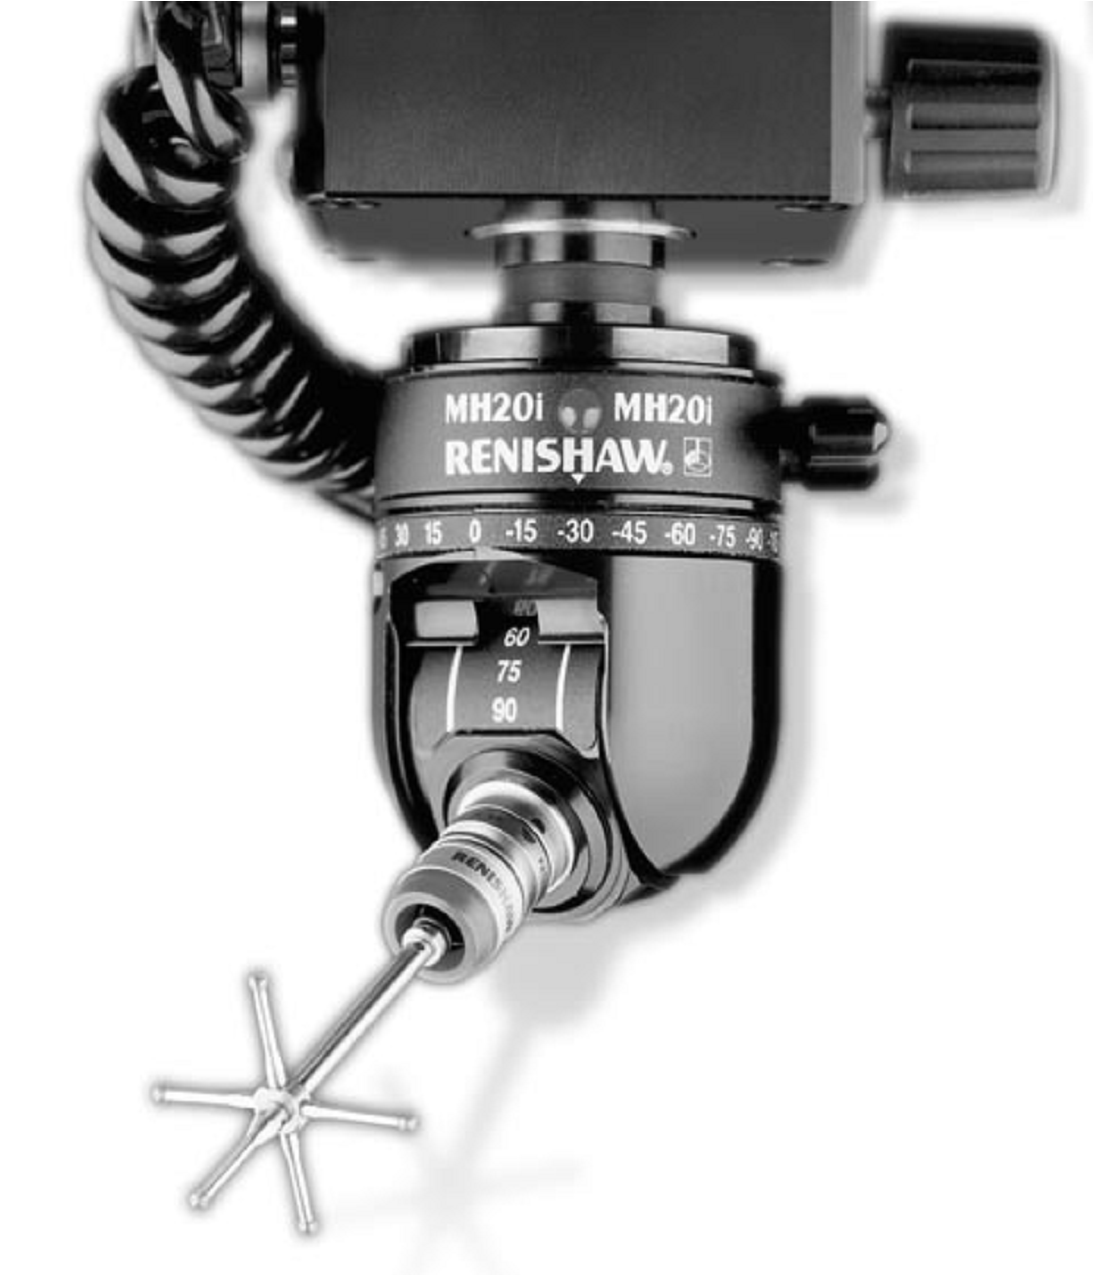
Renishaw Manual Indexable Probehead MH20i (Included)
MH20i Probe Head Specifications*:
|
· Total angular movement in horizontal axis: + 180° in 15° increments.
· Total angular movement in vertical axis: 0°- 90° in 15° increments.
· Repeatability: 2.5 µm (TP20 EM2 stylus module and 20 mm)
· Maximum load : EM2 extended module - 94.5 mm
TESA Probe Syli Kit # 7 (M2 x 0.4)
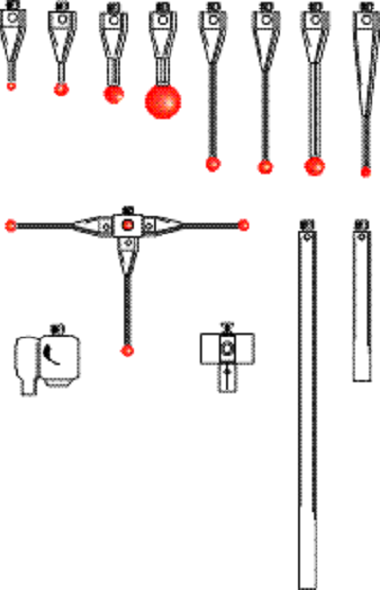 1 x Crosspieces 5 directions M2
1 x Star Styli 5 way M2 30
1 x Articulation M2
1 x Box
2 x Stylus M2 ST Ruby ball Dia. 1 mm, Length 10 mm
6 x Stylus M2 ST Ruby ball Dia. 2 mm, Length 10 mm
2 x Stylus M2 ST Ruby ball Dia. 3 mm, Length 10 mm
2 x Stylus M2 ST Ruby ball Dia. 4 mm, Length 10 mm
1 x Stylus M2 ST Ruby ball Dia. 1 mm, Length 20 mm
2 x Stylus M2 ST Ruby ball Dia. 2 mm, Length 20 mm
1 x Stylus M2 ST Ruby ball Dia. 3 mm. Length 20 mm
1 x Stylus M2 ST Ruby ball Dia. 4 mm, Length 20 mm
2 x Extension M2, L = 10 mm
1 x Extension M2, L = 20 mm
Sản phẩm liên quan
-
Giá: lien he
-
Giá: lien he
-
Giá: lien he
-
Giá: lien he
-
Giá: liên hệ
-
Giá: lien he
-
Giá: lien he
-
Giá: lien he
-
Giá: lien he


